Identifying your board
If you’ve recently bought an Ender 3 Pro, you should check your firmware version and version printed on your Ender 3 Pro board. Newer boards will be much easier to update and don’t require additional hardware to update. It’s highly recommended that you keep your printer firmware up to date. Current version of Marlin will provide lots of small features in addition to critical security features like thermal runaway protection.
So first off, you should go to “About Printer” on your printer interface to check what the current firmware version is. If you have a firmware version with a low version number that is dated after Spring 2020, there’s a good chance you have a Ender 3 Pro with a V4.2.2 board. In my scenario, the Ender 3 Pro I got from Microcenter had version “0.0.6” and was dated August 2020.
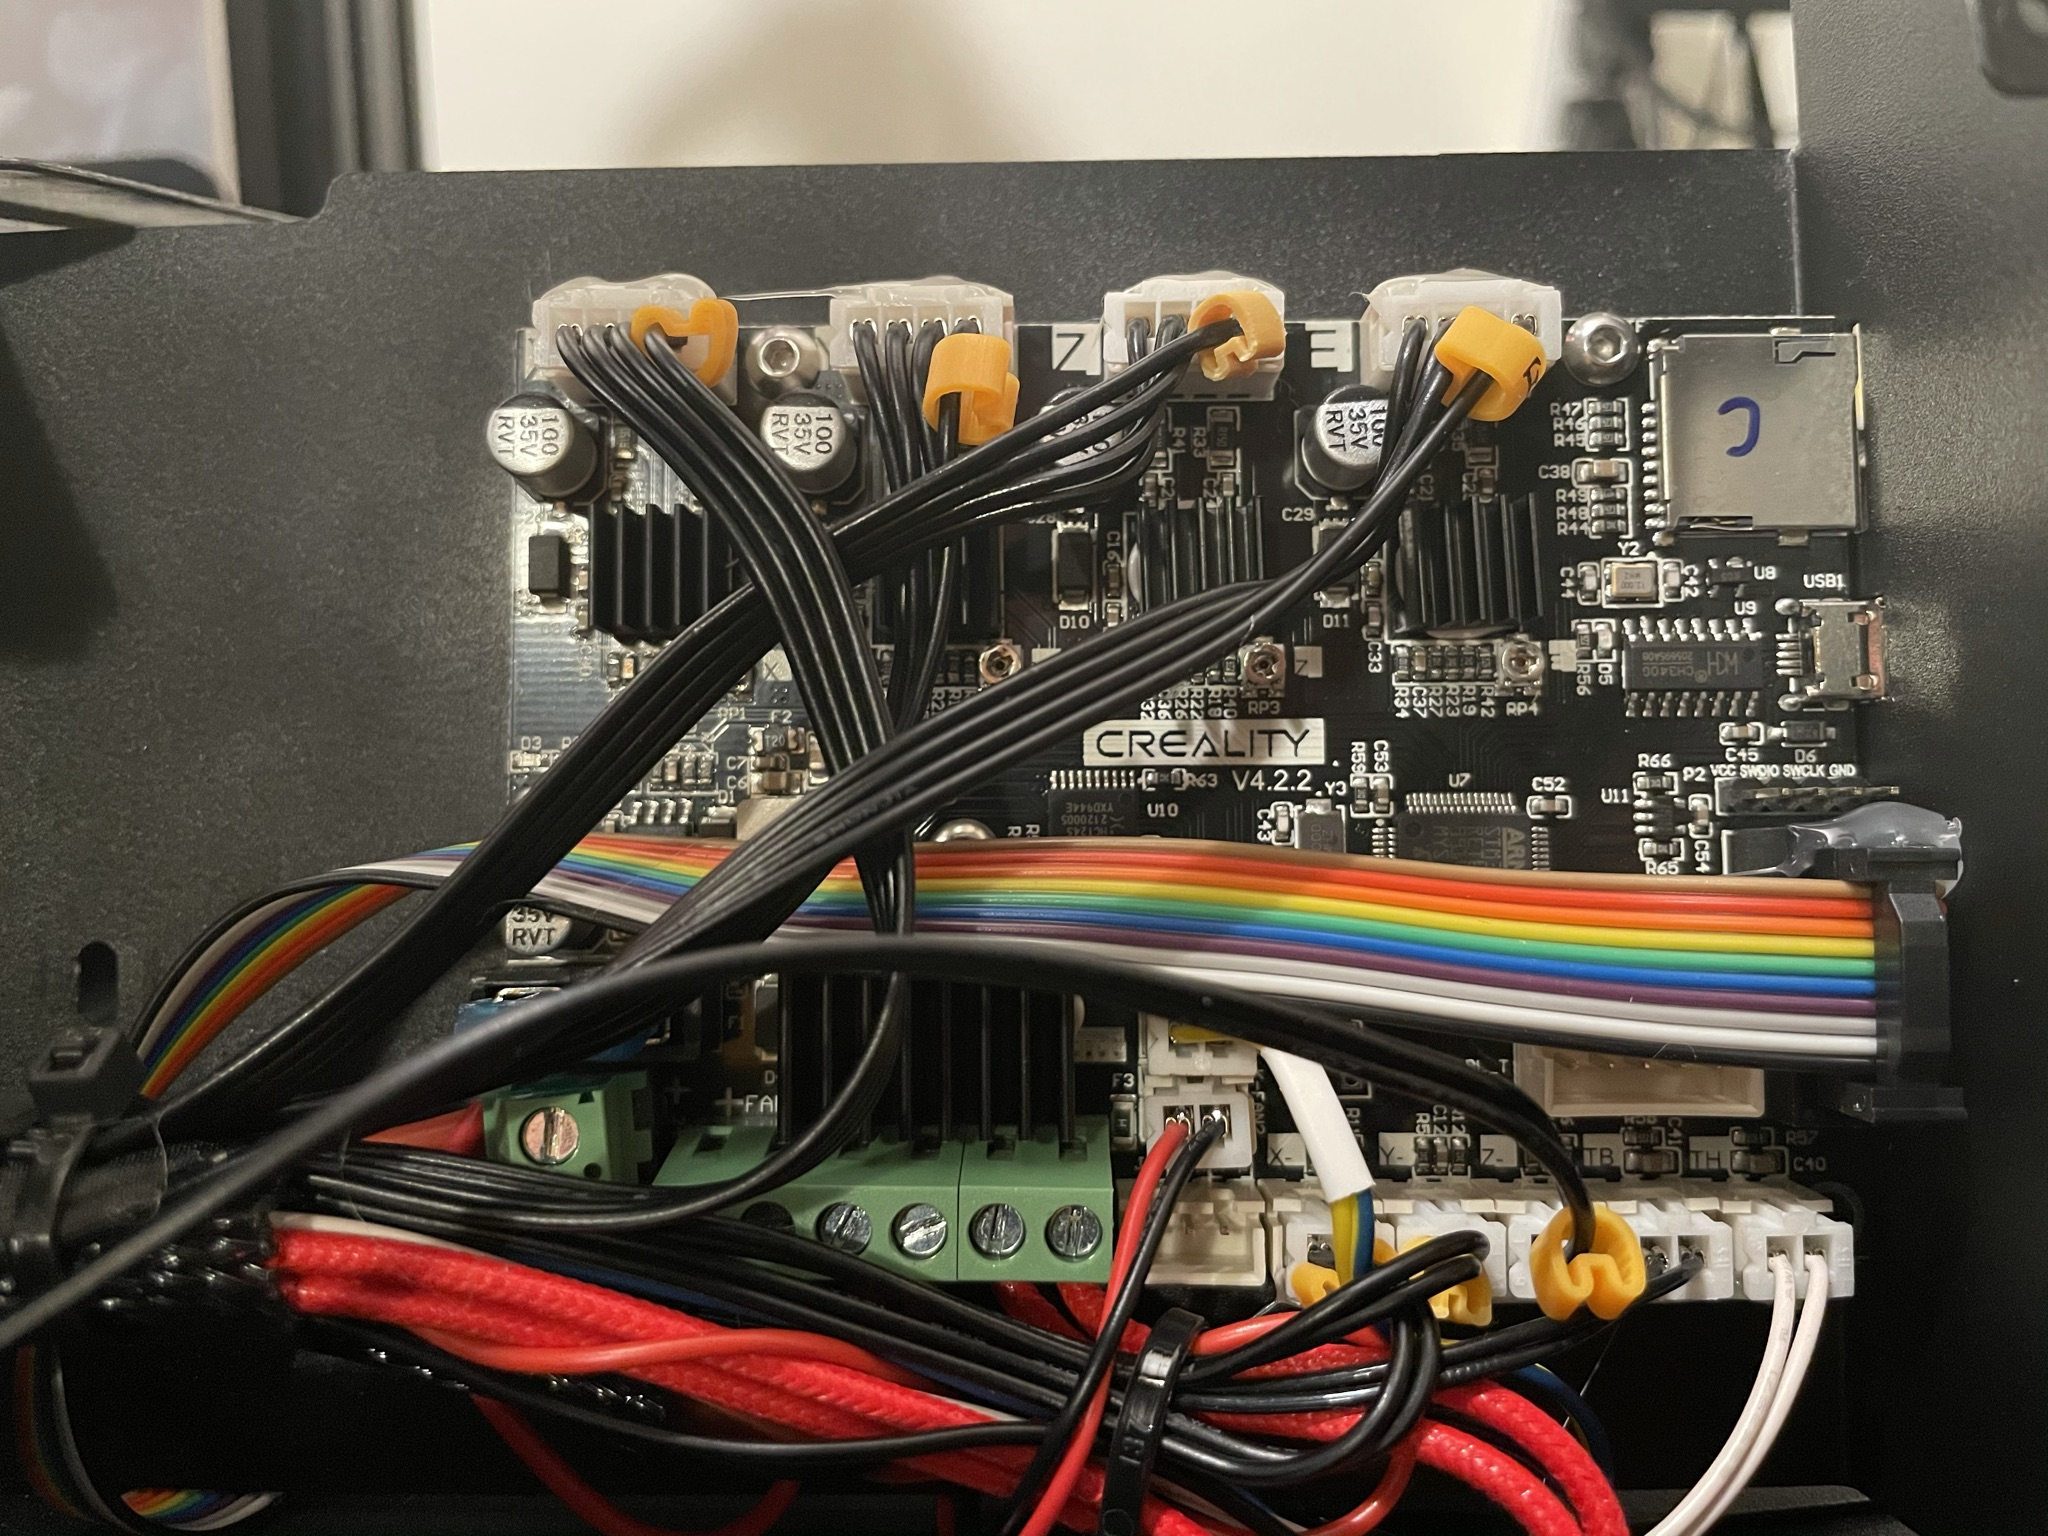
Another reason for checking the firmware version first is that the V4.2.2 board is mounted differently than the older one. Every guide I found online indicated that the board would be mounted to the bottom of the metal case, but my board was mounted to the top.
If the firmware version number isn’t a giveaway, then the next step is to get access to the board and check what version is printed on it.

Once I identified my board, I was able to find out that Marlin now includes config files for “Ender 3 Pro v1.5”.
If you have an older board that doesn’t look like the picture above, the rest of this guide won’t be much help to you. I suggest grabbing an Arduino Uno and some jumper wires, then installing Arduino IDE. This guide looks promising.
If you already have a Raspberry Pi, then I suggest following this guide or this guide.
Ender 3 Pro V1.5
If you’re like me and you have a V4.2.2 board then congratulations, this process just got a whole lot easier for you. All you have to do is place the fimware update on your microSD card and start up your printer. No additional hardware required.
From here you should install VSCode and get the PlatformIO IDE extension. Then follow the Marlin guide and modify the following value in the platformio.ini file:
default_envs = STM32F103RET6_creality
Finally, download the config files zip and copy the files from /Creality/Ender-3 Pro/CrealityV422/ into your Marlin directory. Now you’re ready to build. In VSCode, click the PlatformIO icon and select “Build All” from the “Project Tasks” dropdown. Once the build completes, grab the firmware*.bin file from /.pio/build/STM32F103RET6_creality/ and copy it to the root directory of a microSD card. Put the microSD card into your Ender 3 Pro and turn it on. The screen will be blank while the firmware is being flashed (this takes 5-10 seconds), but once it completes you will be greeted with a Marlin splashscreen. Tada!